How to Create a Gallery Wall
A gallery wall is one of the most effective ways to showcase personality, style, and artistic expression within a home or office.
Unlike a single piece of artwork, a gallery wall allows for flexibility and creativity, giving you the opportunity to curate a collection that evolves over time.
Whether you prefer a structured, symmetrical display or an eclectic, free-form arrangement, a gallery wall can become a focal point that enhances the character of any room.
The question is: how to create a gallery wall that’s cohesive, aesthetic, and fully showcases your self-expression.
The beauty of a gallery wall is that it can be highly personalized. It can include framed photographs, paintings, prints, mirrors, and even three-dimensional objects that add depth and texture.
The key to designing a successful gallery wall lies in careful planning, selecting a cohesive theme, and ensuring the arrangement complements the space rather than overwhelming it.
A well-thought-out gallery wall tells a story.
It can capture your travels through framed custom map posters and vacation photo collage posters, showcase your love for art through a carefully curated selection of art prints, or preserve memories with an arrangement of family portraits and sentimental keepsakes.
Regardless of the direction you choose, the goal is to create a display that feels intentional and visually appealing.
Another advantage of a gallery wall is its adaptability. Over time, pieces can be swapped out or rearranged to refresh the look without requiring a complete redesign. This makes it a cost-effective and dynamic decorating option.
Whether you’re designing a gallery wall in your living room, hallway, office, or bedroom, taking the time to plan and execute it properly will ensure it becomes a lasting and cherished feature in your space.
Let’s walk through each step of this exciting process, from selecting the artwork to arranging the layout and properly hanging your pieces, and tell you everything you need to know about how to create a gallery wall!
Step 1: Choosing a Theme
The foundation of any successful gallery wall is a well-defined theme. A theme provides cohesion and ensures that all the elements work together to create a unified aesthetic.
While it is possible to mix and match different styles, having an overarching theme helps to maintain visual harmony and prevents the arrangement from appearing disjointed.
Why a Theme Matters
A theme serves as the guiding principle behind the gallery wall, making it easier to select artwork, frames, and accessories.
It also provides a sense of intentionality, helping the display feel curated rather than randomly assembled. When every piece contributes to a larger concept, the gallery wall becomes a reflection of personal tastes and interests rather than just a collection of unrelated images.
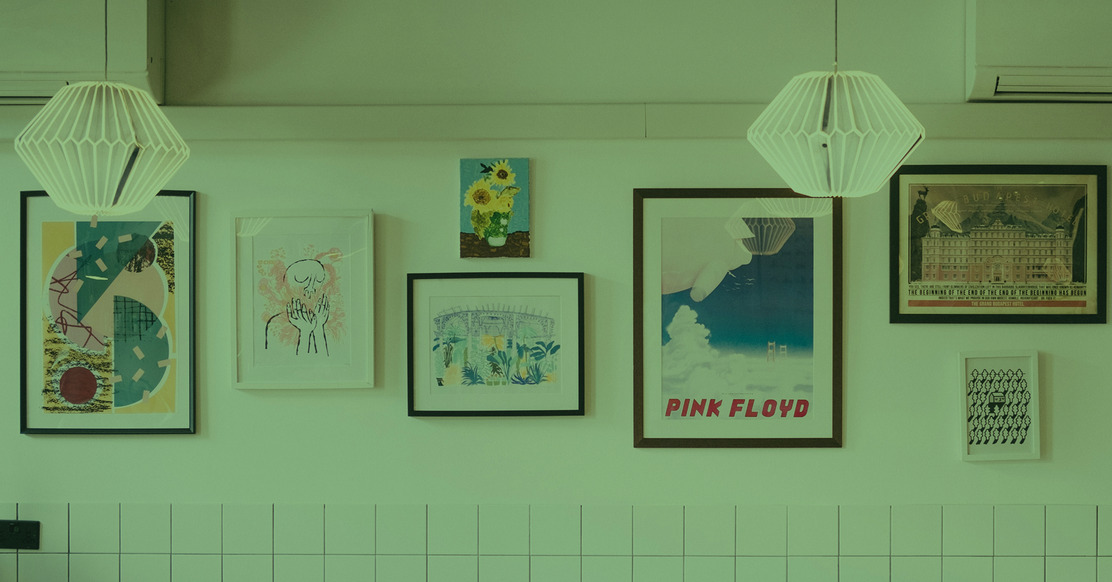
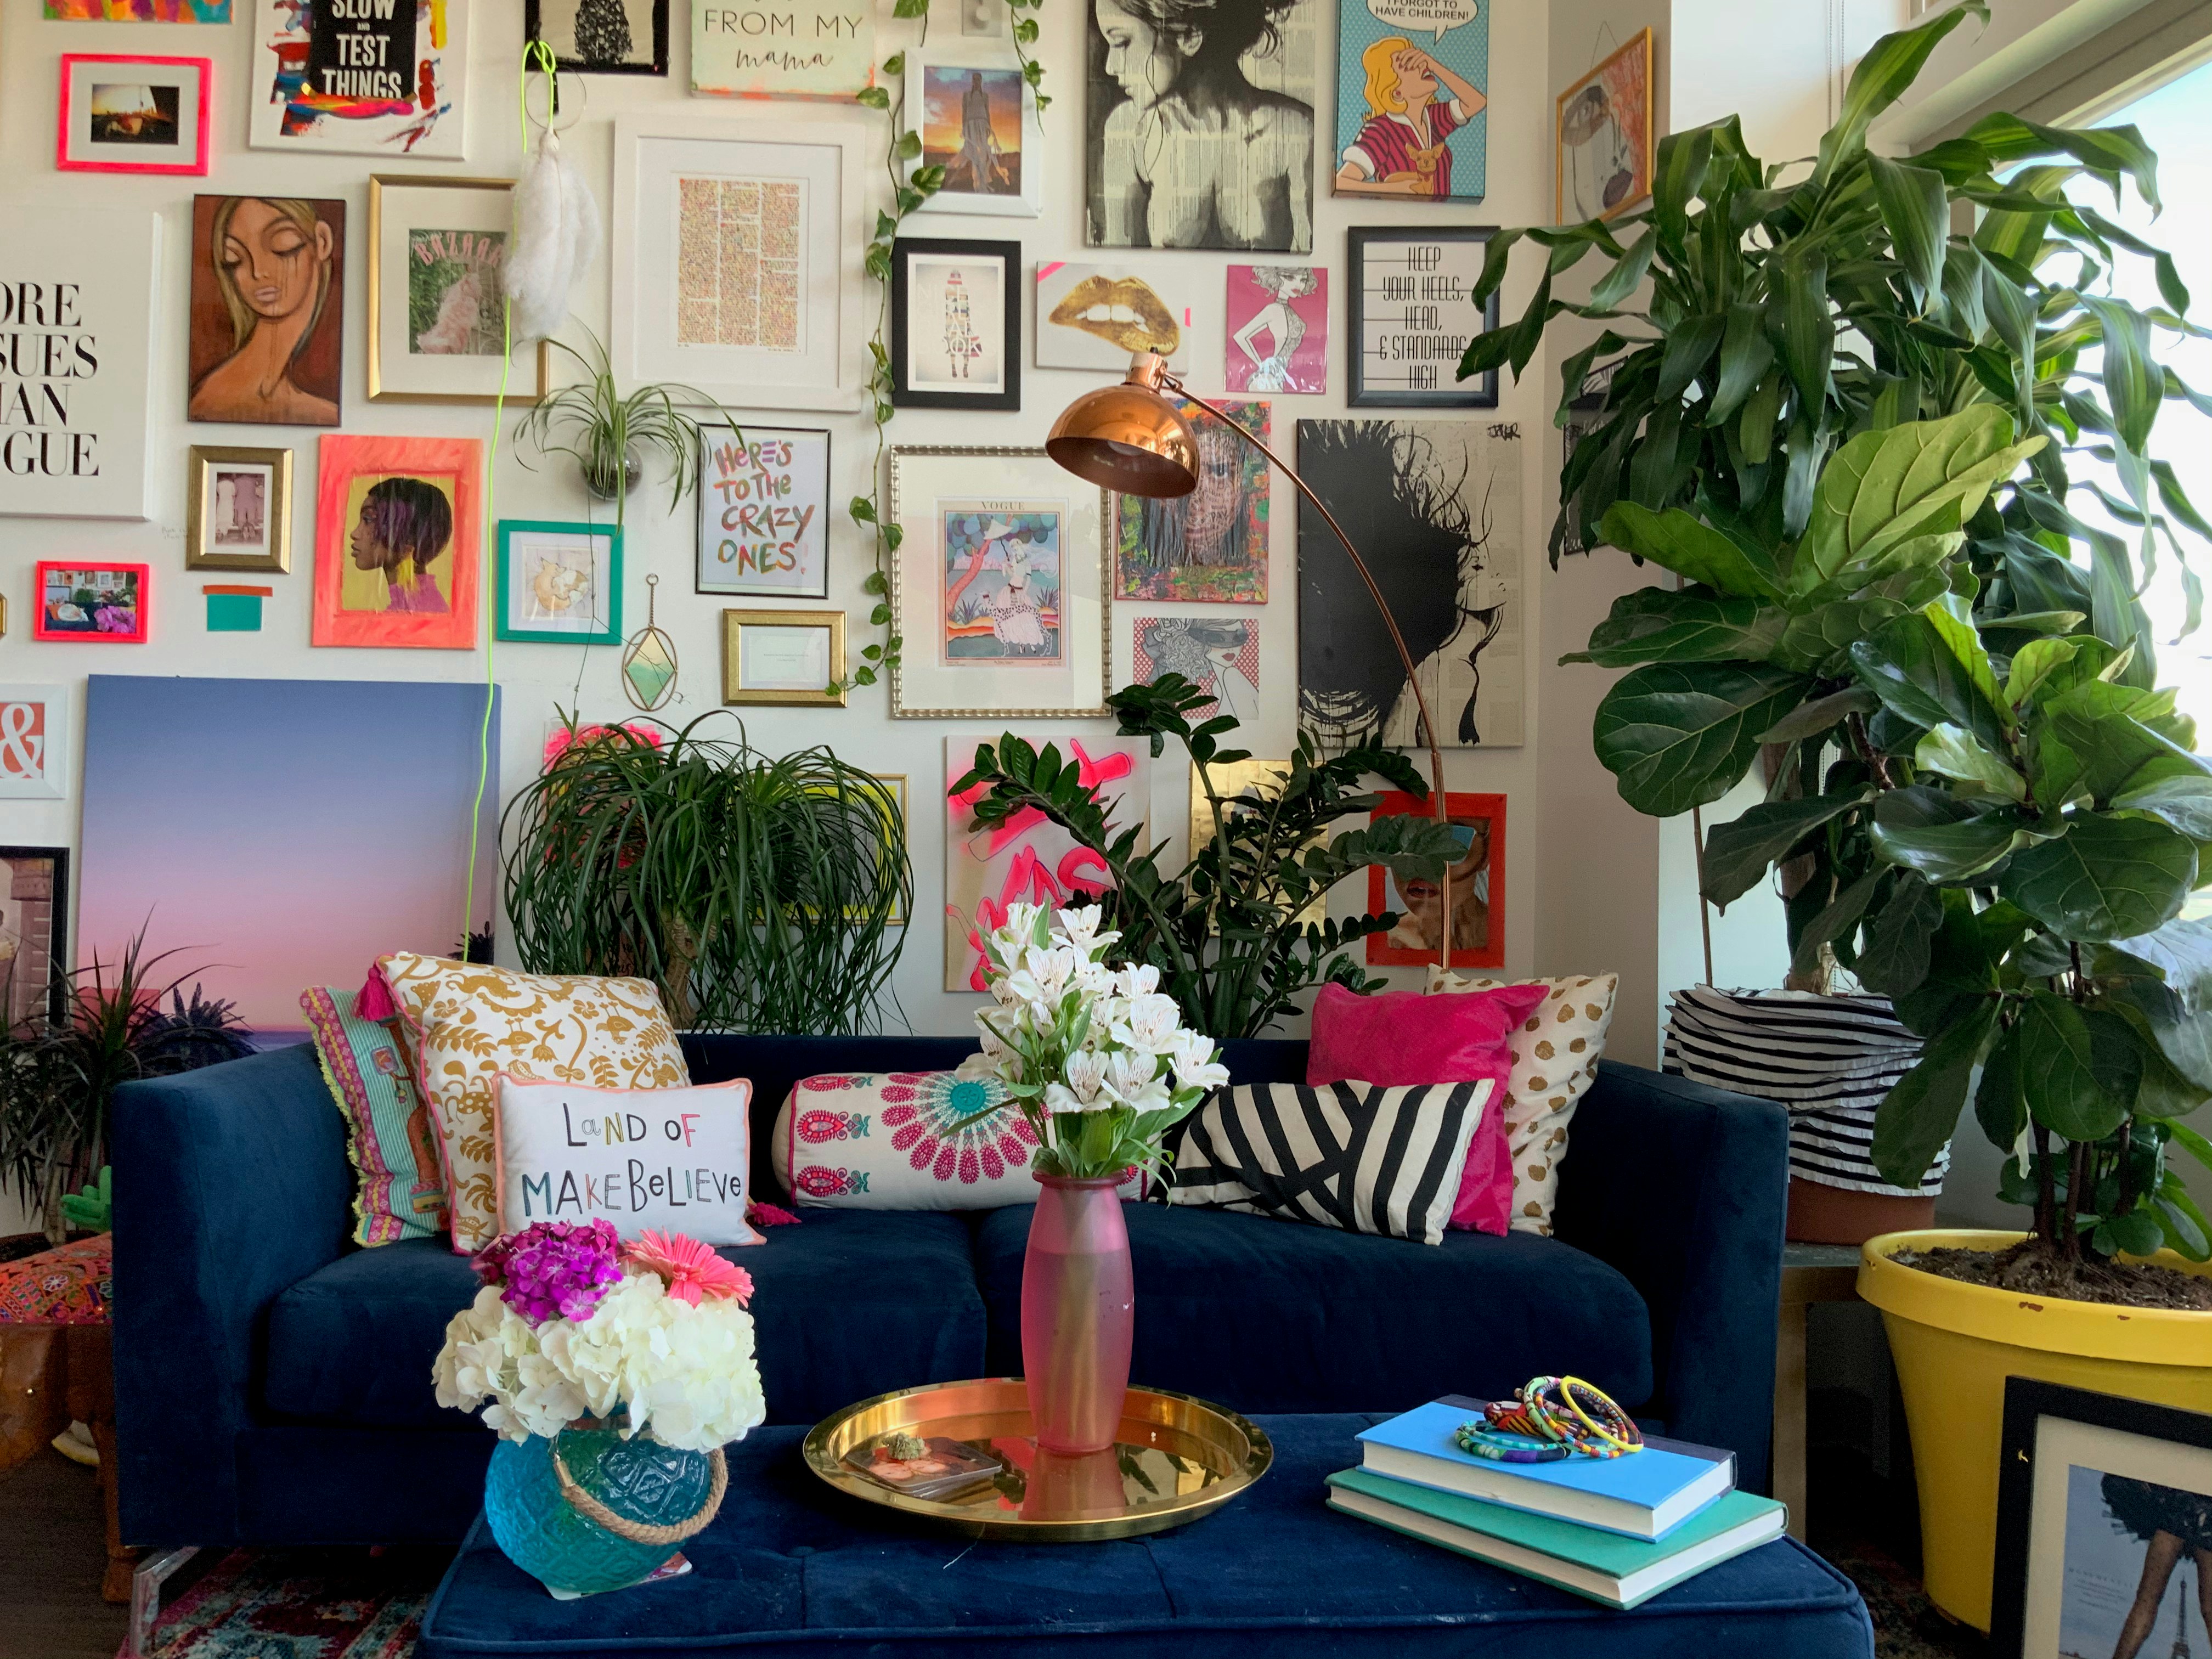
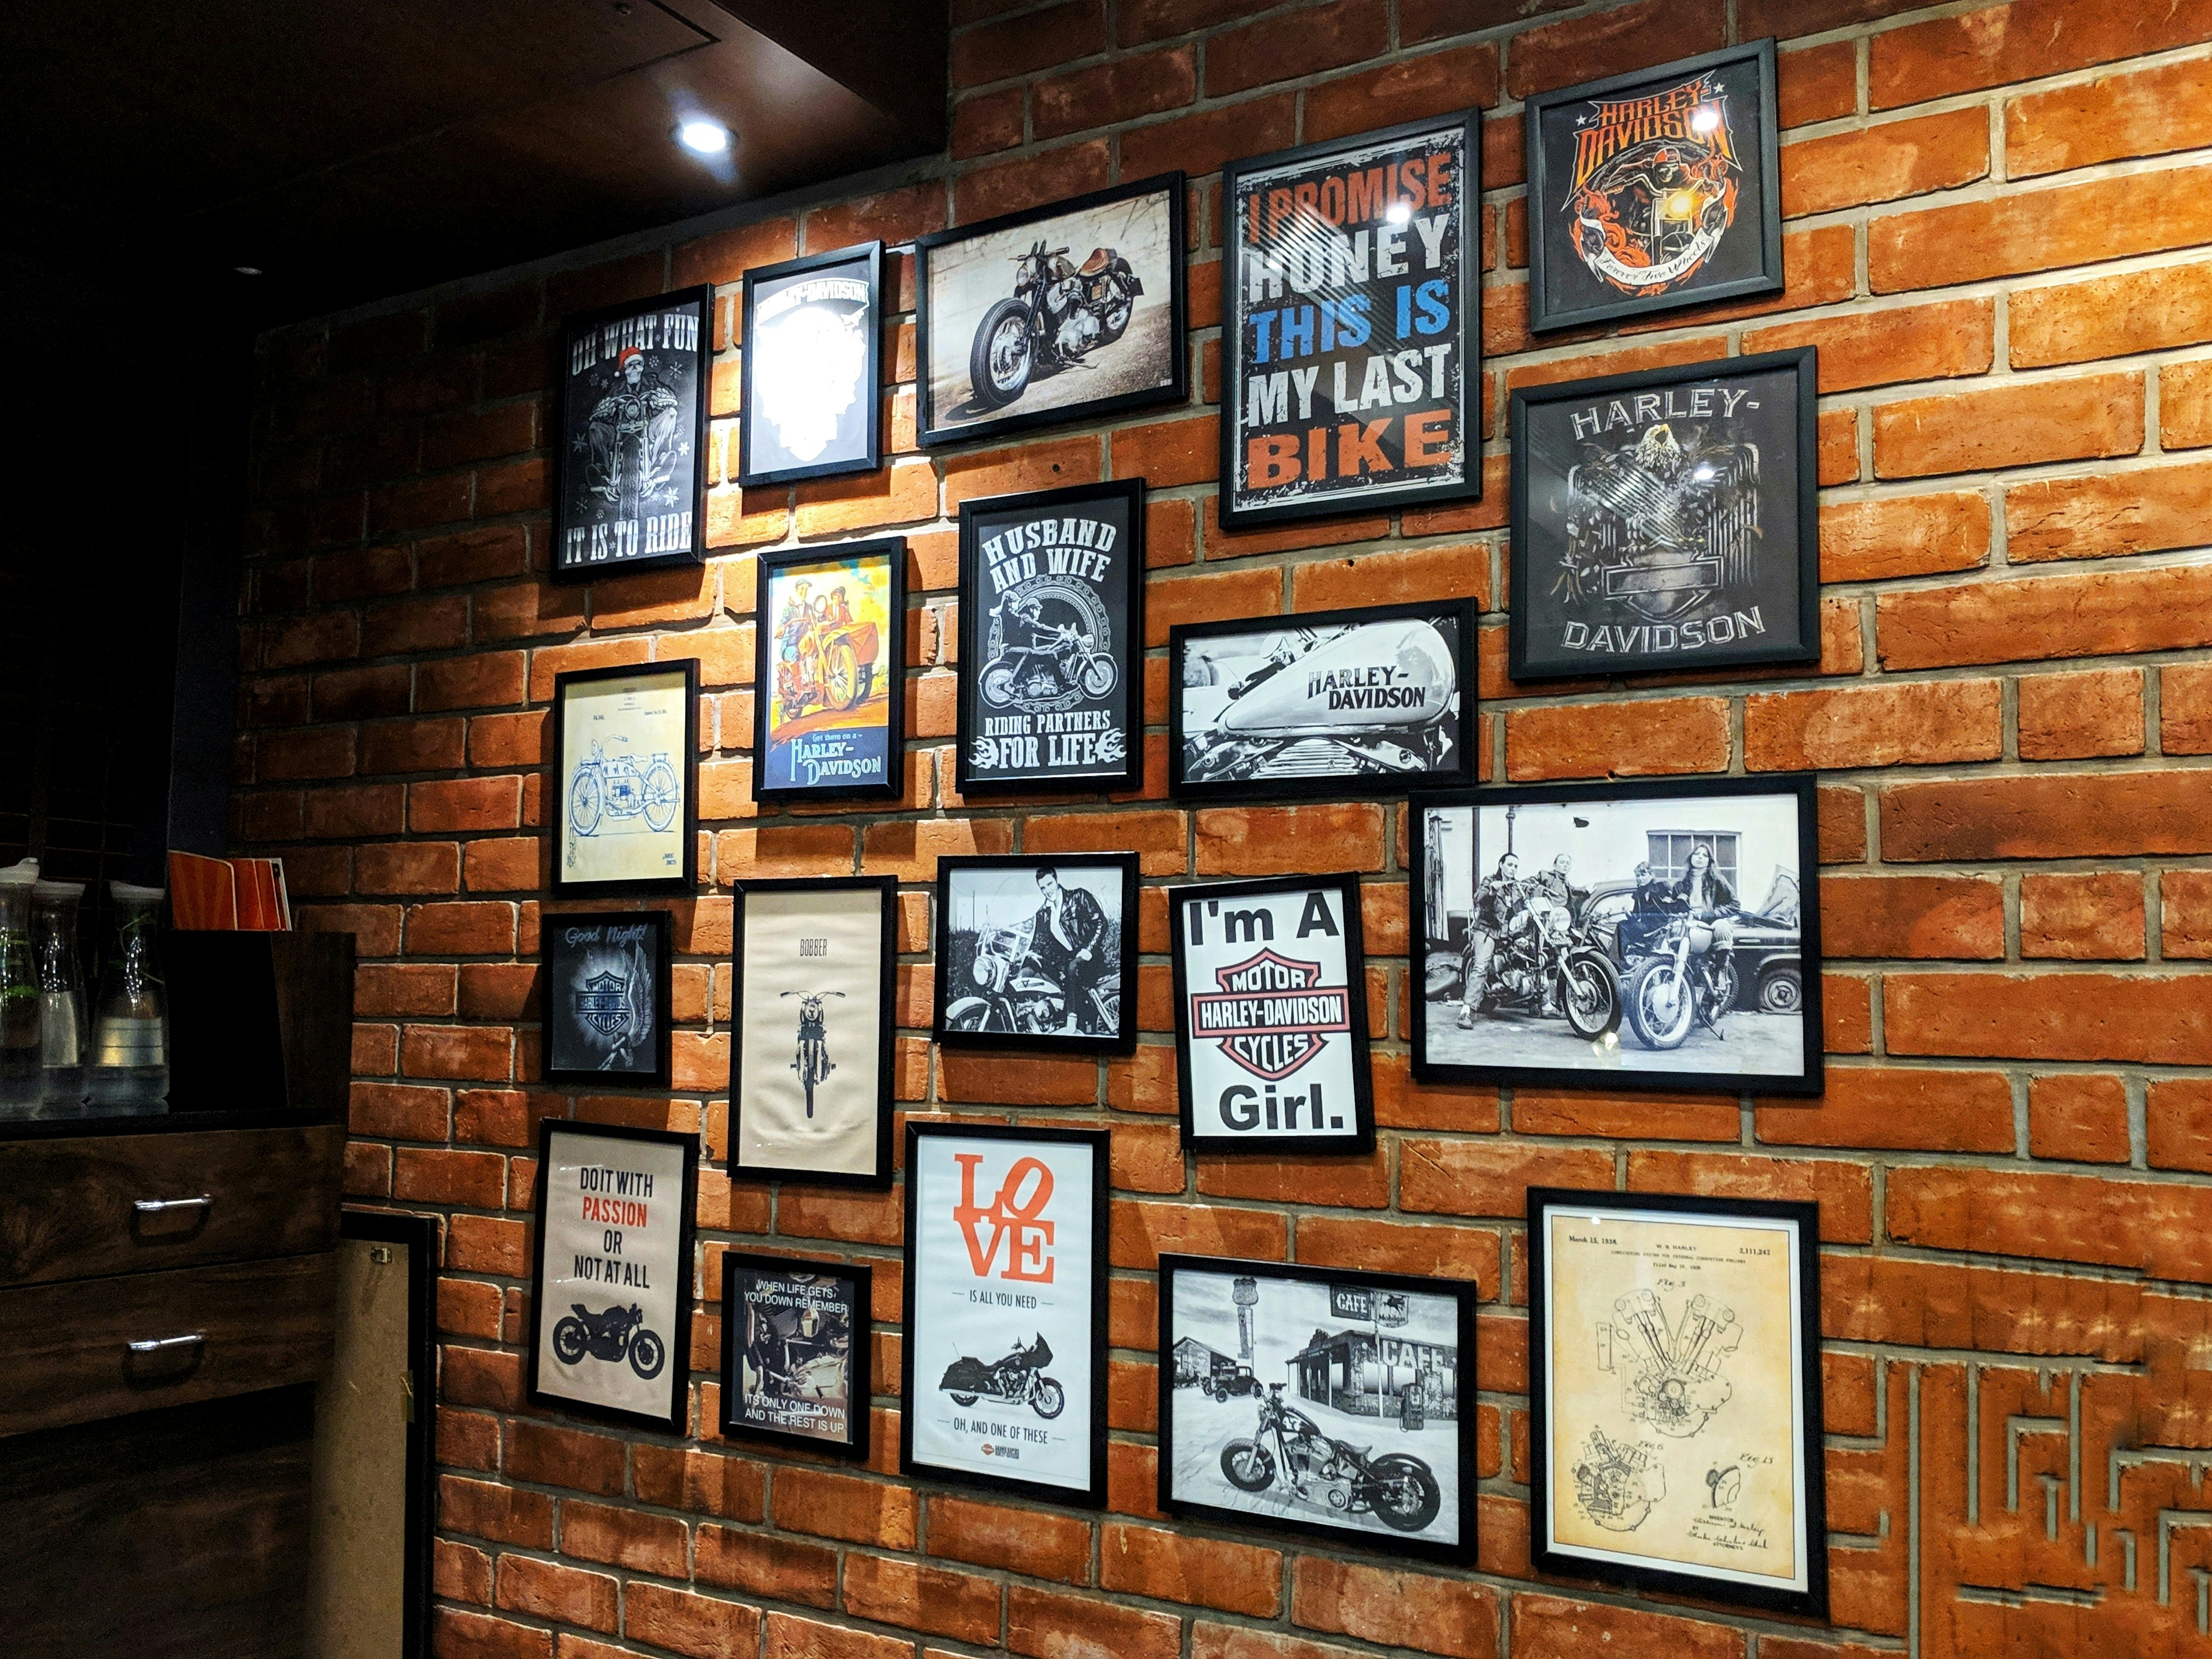
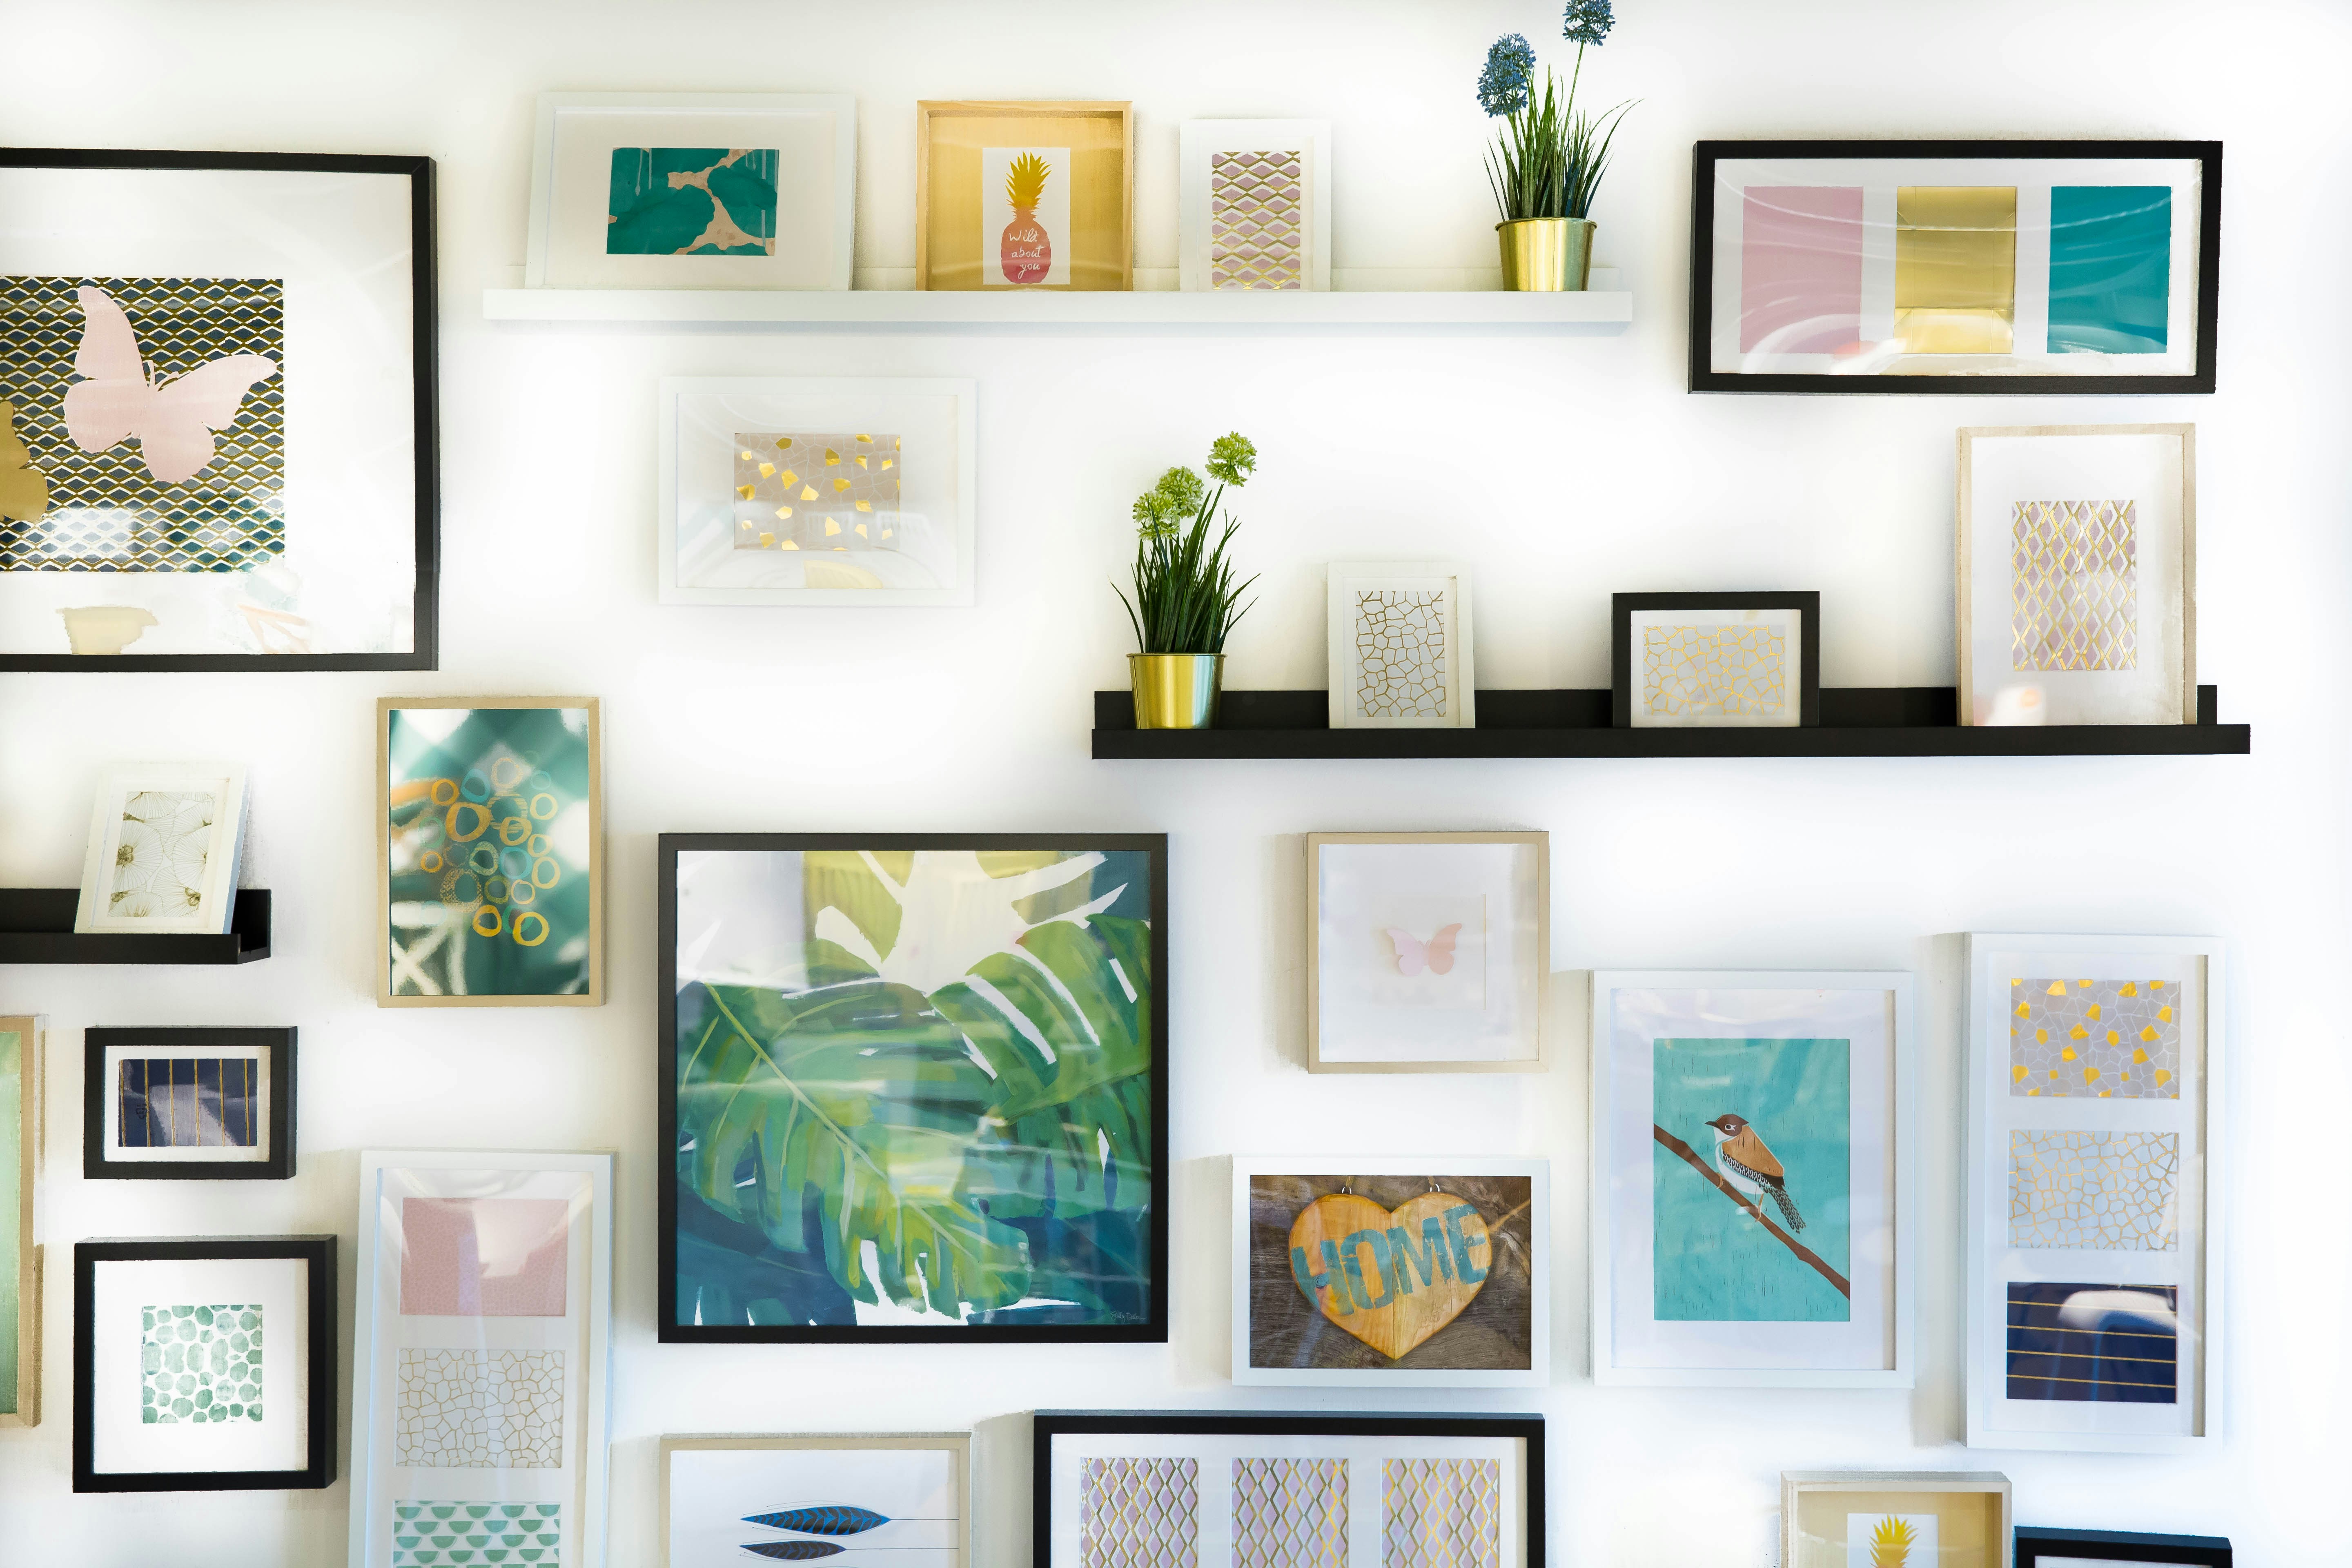
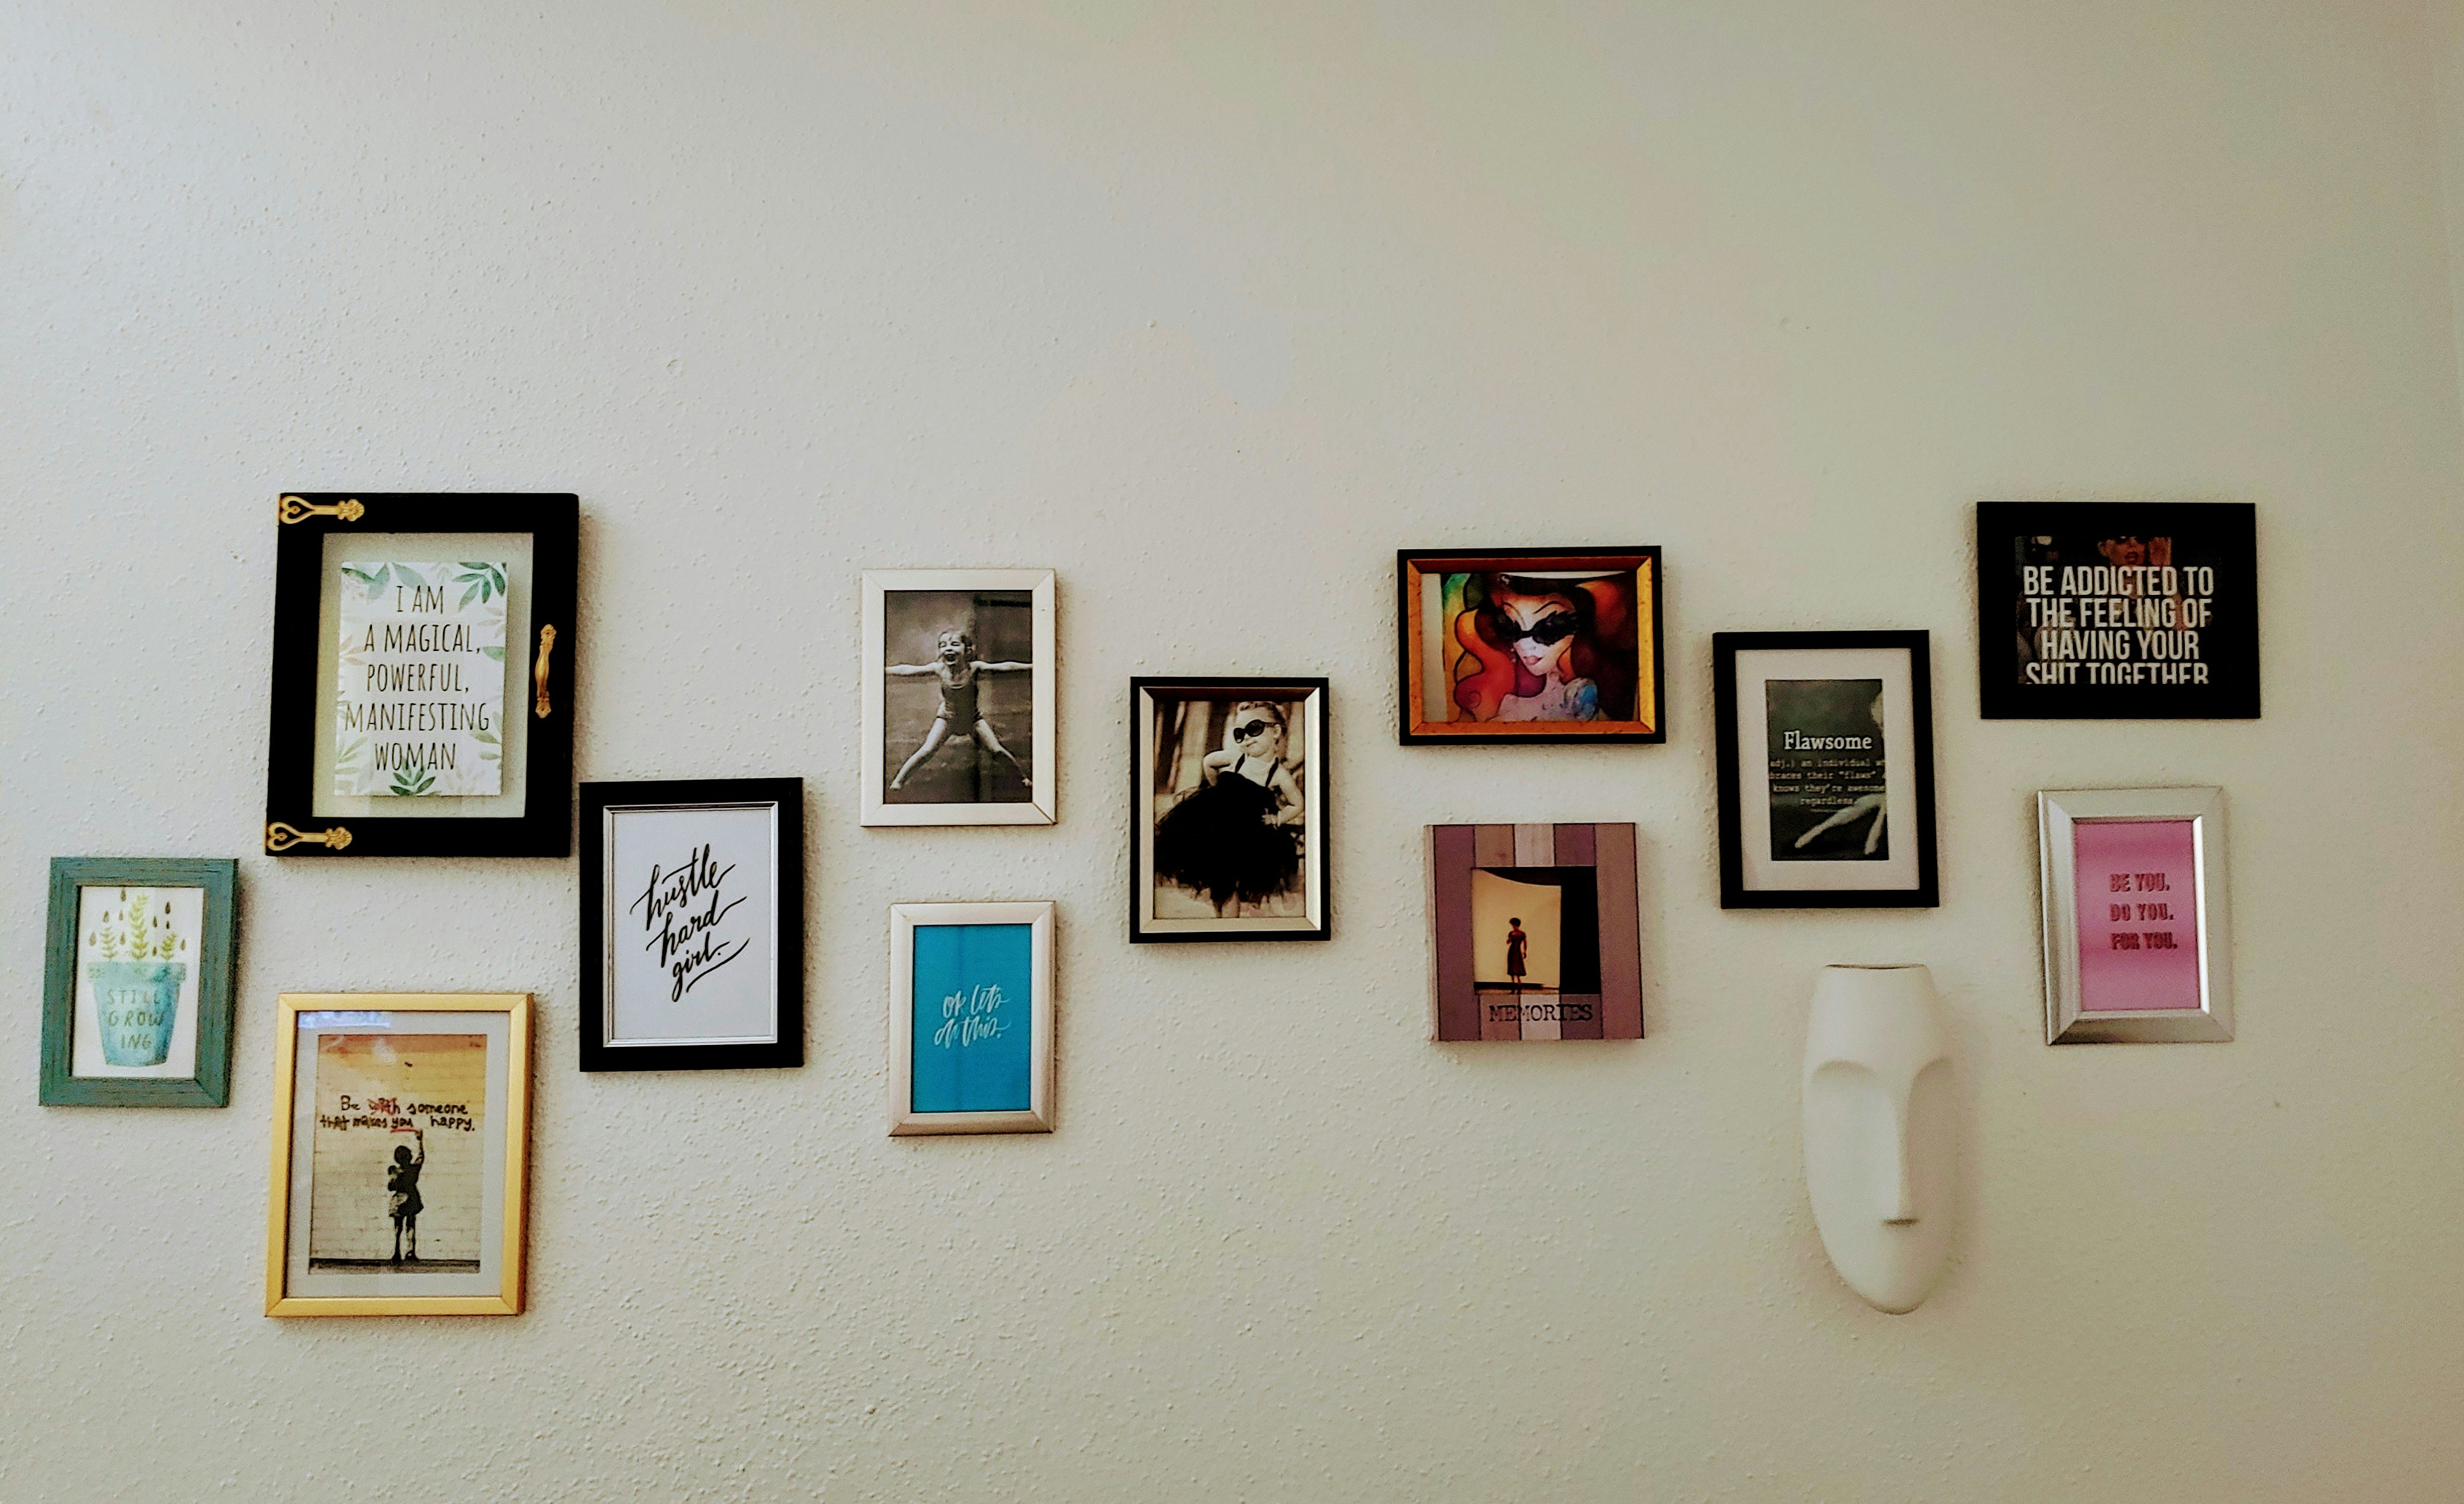
Popular Gallery Wall Themes
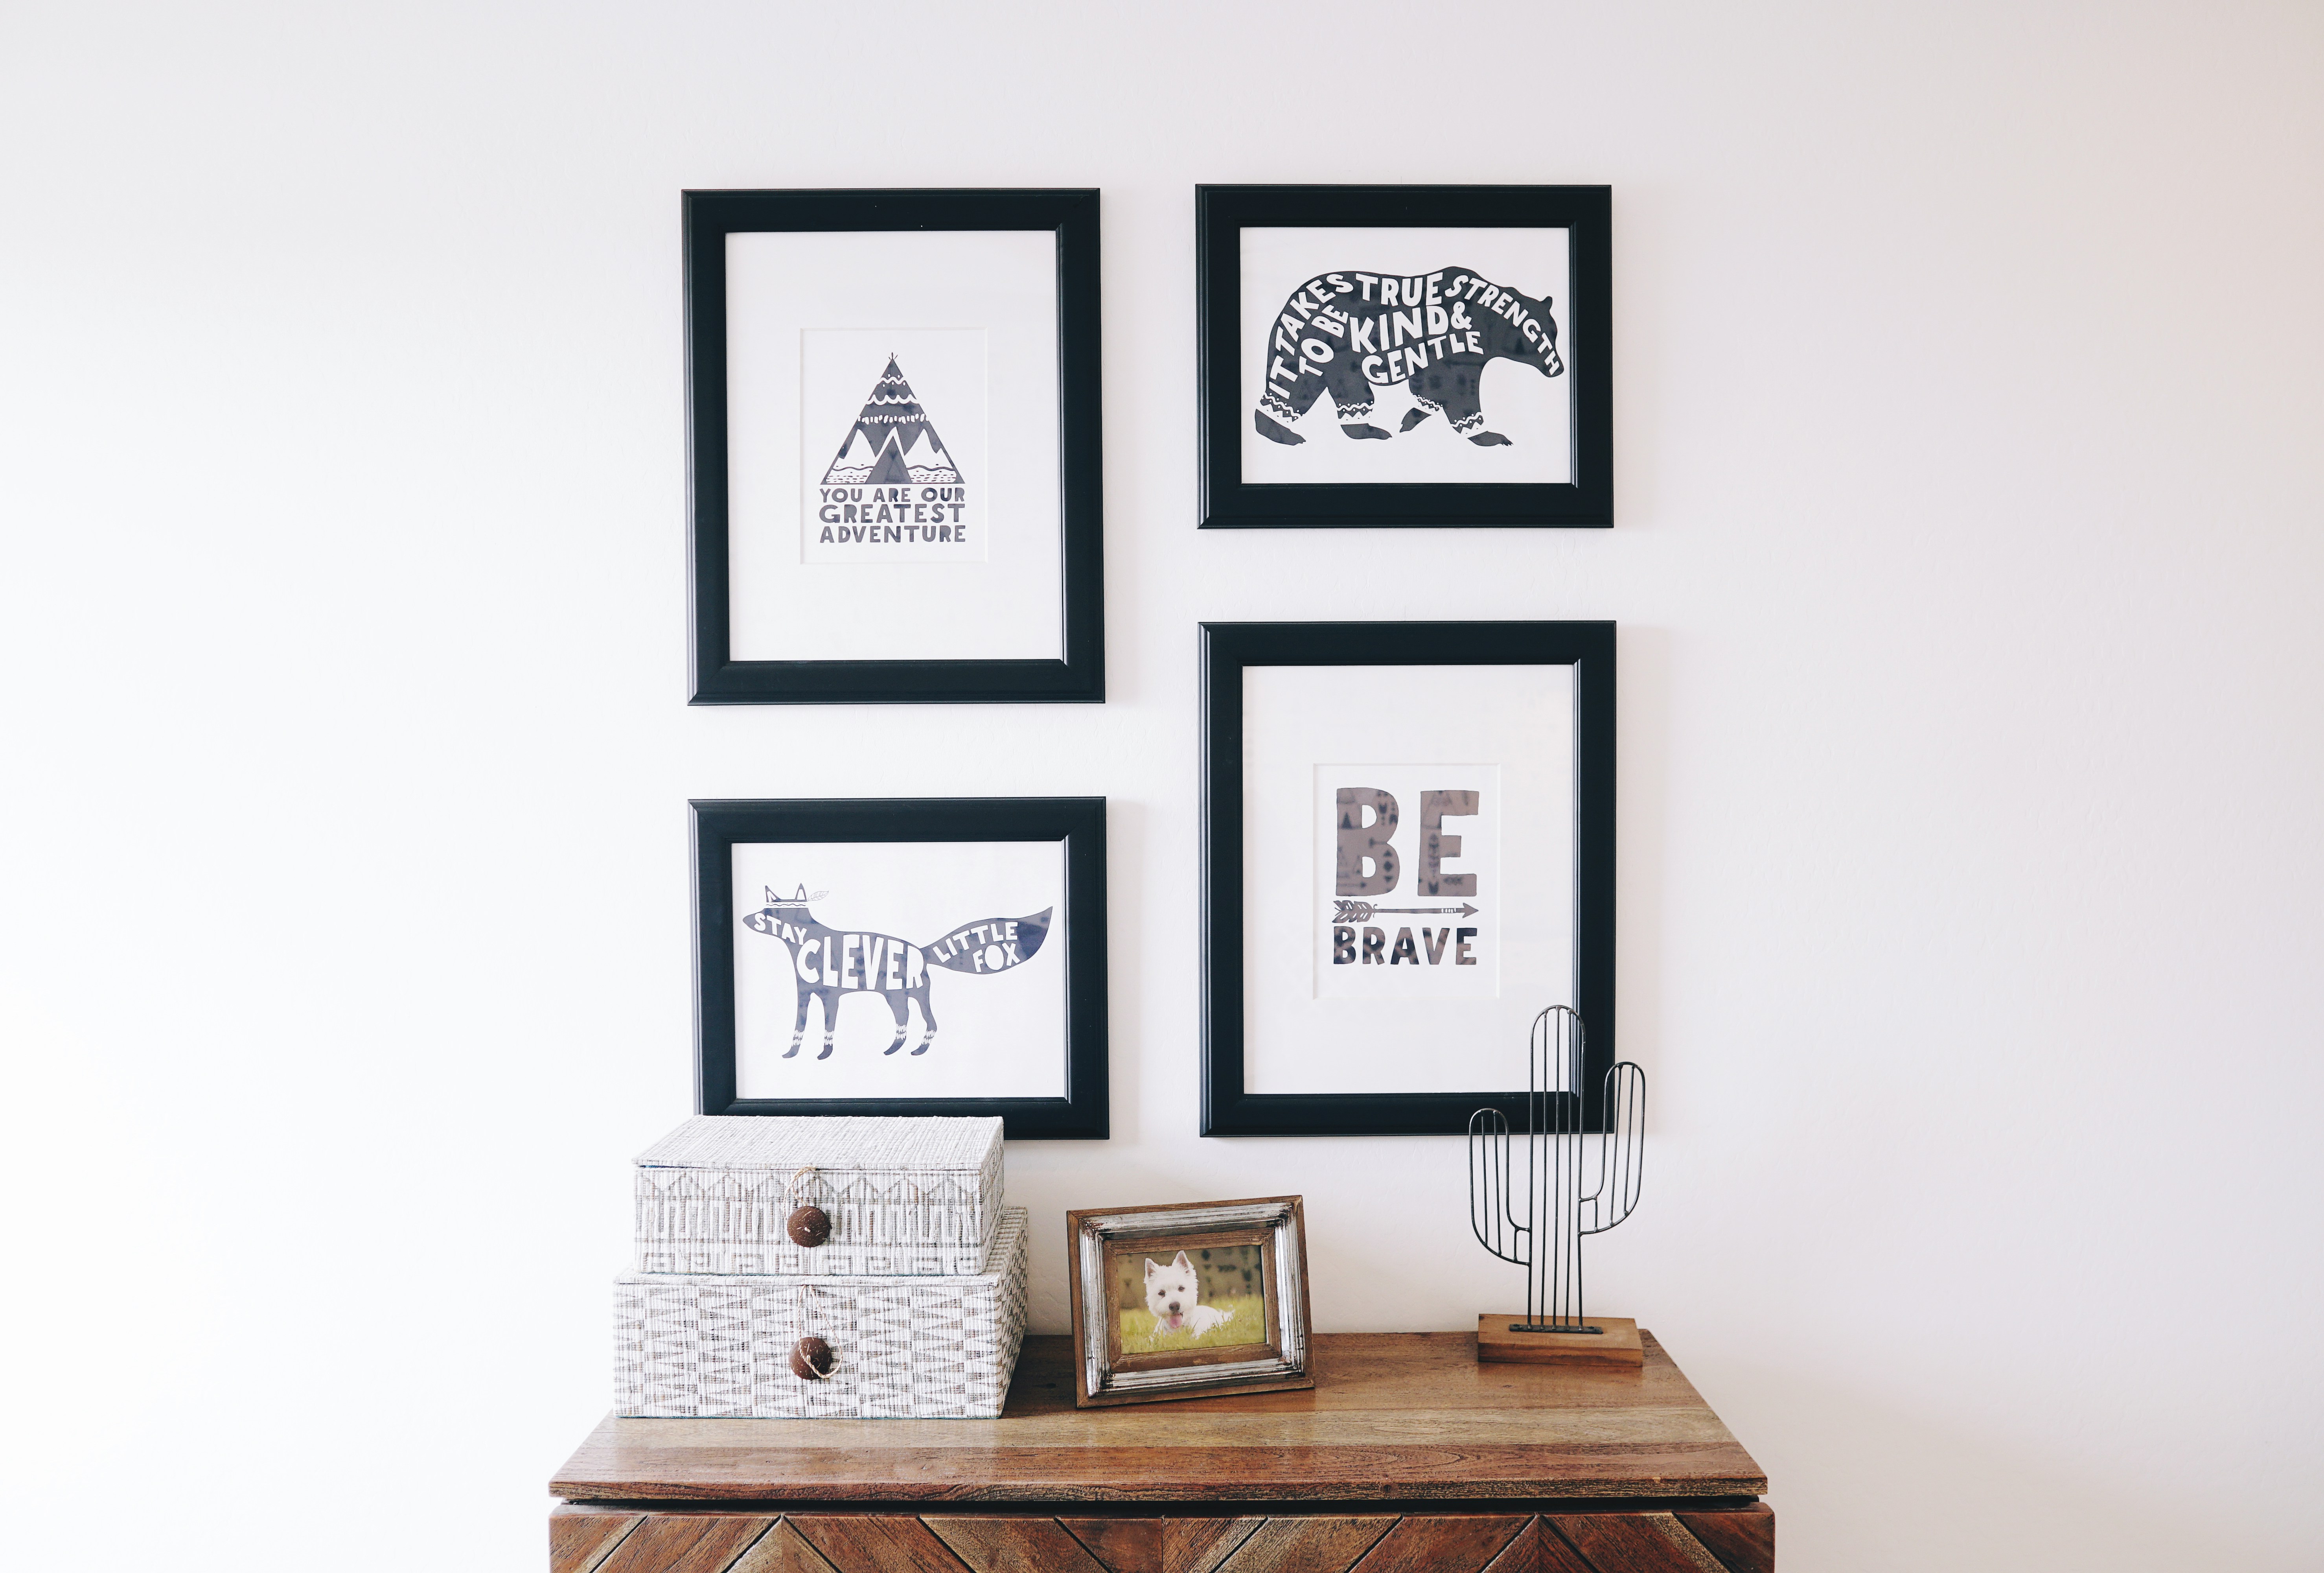
- Minimalist Elegance: Featuring black-and-white photography, monochromatic prints, and simple geometric designs, this theme embraces clean lines and uncluttered arrangements.
- Eclectic Bohemian: A vibrant mix of colors, textures, and patterns with an assortment of artwork styles, vintage finds, and handcrafted elements.
- Family & Memories: A sentimental approach that includes framed photographs, heirloom pieces, and meaningful quotes.
- Travel & Adventure: Showcasing framed maps, destination photographs, postcards, and cultural artwork.
- Nature & Botanical: Featuring plant illustrations, floral prints, and earthy tones that bring the beauty of nature indoors.
- Modern Abstract: A collection of contemporary abstract paintings, bold color blocks, and artistic compositions that make a strong statement.
How to Select the Right Theme for Your Space
When choosing a theme, consider the overall decor of the room where the gallery wall will be placed. The theme should complement the existing furniture, color palette, and architectural features of the space.
For instance, a minimalist gallery wall works well in a modern home with sleek furnishings, while a travel-themed wall might be ideal for an office or hallway.
Another factor to consider is personal preference. A gallery wall is a reflection of individual style and should include elements that resonate on a personal level.
If a particular theme feels uninspiring, it may not be the right choice. Instead, opt for a concept that excites and inspires, ensuring that the final result is something you will enjoy looking at every day.
Step 2: Selecting Artwork and Frames
Once a theme has been established, the next step in creating a gallery wall is selecting the artwork and frames that will bring the vision to life.
This process requires careful consideration to ensure that the pieces chosen complement each other and contribute to a unified aesthetic.
How to Choose the Right Artwork
Artwork selection is the heart of a gallery wall. The pieces chosen should reflect the established theme while also allowing for a mix of styles, mediums, and sizes to create visual interest.
Here are some tips to guide the selection process:
- Mix Different Mediums: Incorporate a combination of paintings, photographs, typography, illustrations, and prints to add variety.
- Play with Scale: Include both large statement pieces and smaller accents to create depth and movement within the gallery wall.
- Choose a Cohesive Color Palette: While diversity is important, sticking to a consistent color scheme will help the display feel more intentional.
- Include Personal Elements: Consider adding custom artwork, personal photographs, or sentimental objects that make the gallery wall unique.
When selecting personal elements for your art, consider creating a customized piece that represents a memory you’d like to be reminded of, a custom star map, birth chart poster, or other types of art from MixPlaces could be your answer!
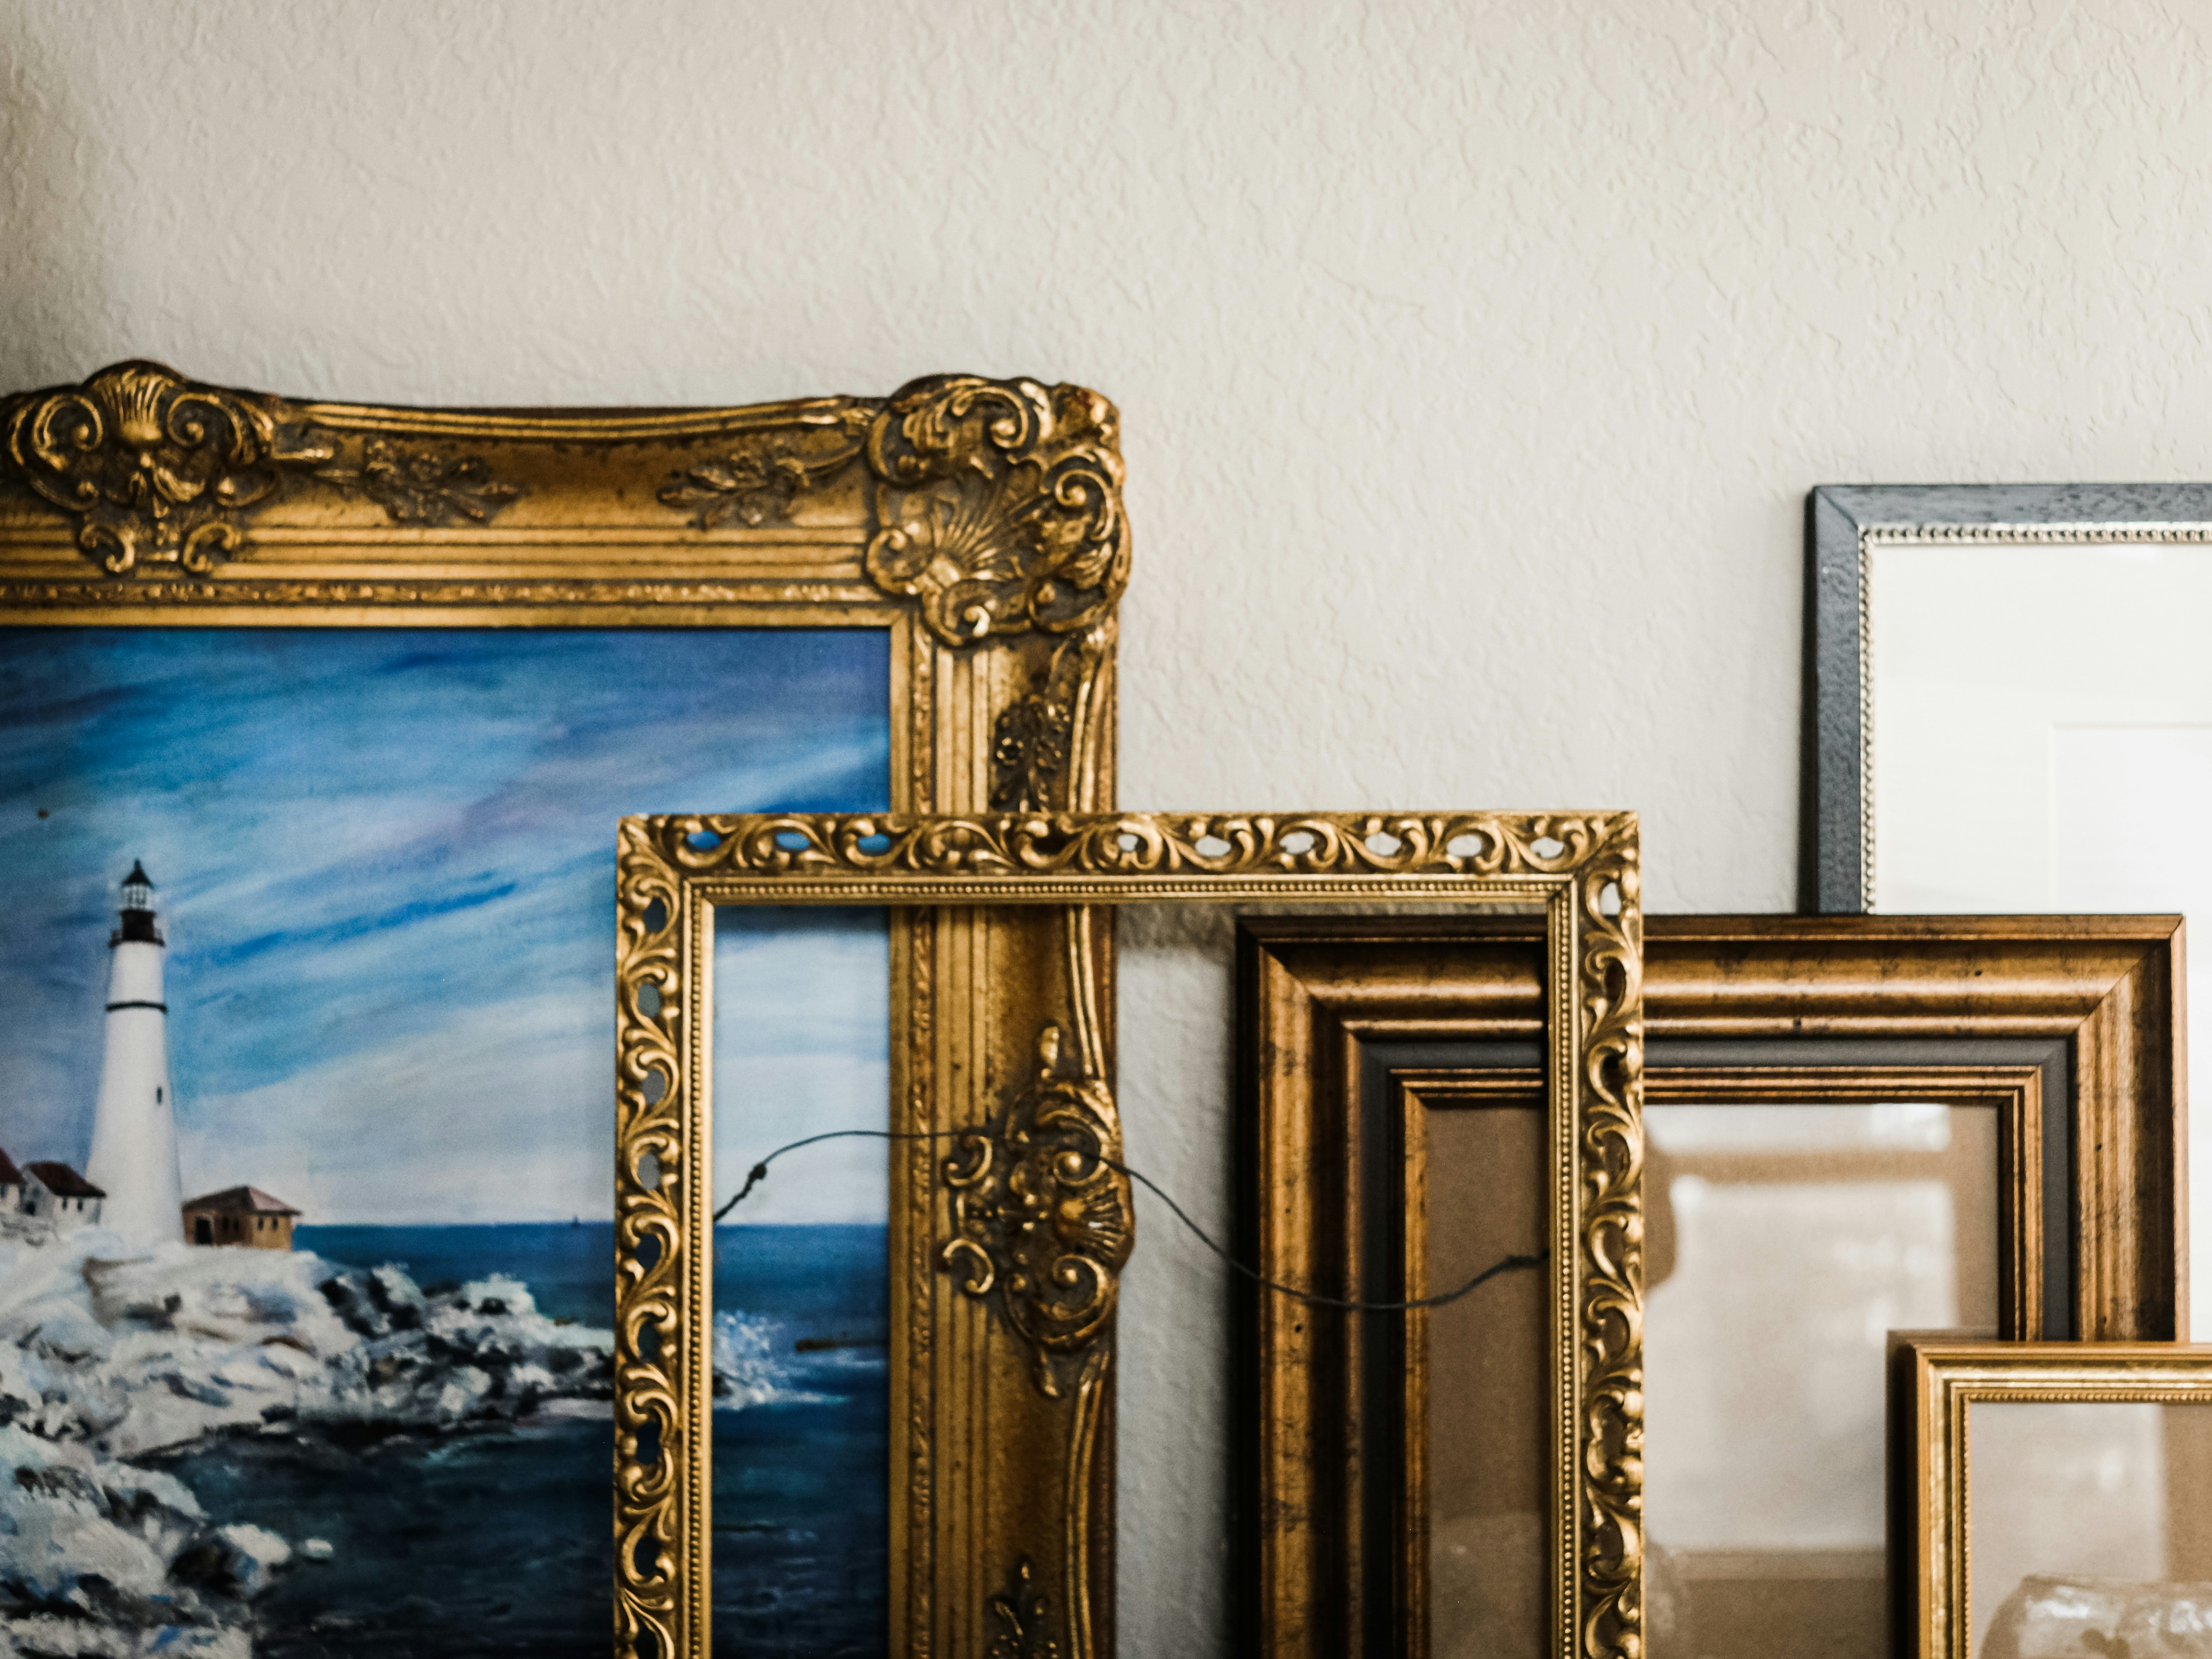
Selecting Frames for a Polished Look
Frames play a crucial role in the overall presentation of a gallery wall. They provide structure, define individual pieces, and contribute to the wall’s aesthetic.
When choosing frames, keep these factors in mind:
- Matching vs. Mismatched Frames: A uniform frame style creates a clean, cohesive look, while mixed frames add an eclectic touch.
- Frame Material: Wood, metal, and acrylic frames each provide a distinct style. Choose materials that align with the overall decor.
- Matting Options: Adding a mat can help artwork stand out and provide breathing room within the composition.
Step 3: Hanging and Securing Your Artwork
Once you have finalized your gallery wall layout, the next step is to ensure each piece is properly secured. Proper hanging techniques are crucial to maintaining the integrity and aesthetic of your gallery wall.
A poorly hung gallery wall can lead to crooked frames, unnecessary wall damage, or even falling artwork. Below, we will cover different techniques for securing artwork and ensuring longevity.
Tools and Materials Needed
Before you begin, gather the necessary tools and materials to make the hanging process efficient and damage-free:
- Measuring tape: Ensures accurate spacing between pieces.
- Level: Prevents frames from hanging crookedly.
- Painter’s tape: Helps mark positions on the wall without causing damage.
- Pencil: For making light, erasable marks as guides.
- Hammer and nails: Traditional hanging method for lightweight pieces.
- Wall anchors and screws: Ideal for heavier frames or if you're hanging artwork on drywall.
- Adhesive strips or hooks: A great alternative for renters or those who wish to avoid holes in the wall.
Step-by-Step Hanging Process
- Mark the Layout on the Wall
- Use painter’s tape to mark where each frame will go.
- Step back and evaluate the spacing and symmetry before committing.
- Measure and Align
- Use a measuring tape to ensure even spacing between frames (2-3 inches is a good rule of thumb).
- Use a level to confirm that each piece is straight.
- Secure with the Appropriate Hanging Method
- Lightweight Frames: Standard nails or adhesive strips can work well.
- Medium-Weight Frames: Use picture-hanging hooks for added stability.
- Heavy Frames or Canvases: Wall anchors and screws are the safest option.
- Final Adjustments
- Once all pieces are in place, step back and make any necessary micro-adjustments.
- Ensure that the frames are aligned and that the overall composition feels balanced.
By taking the time to hang and secure each piece correctly, your gallery wall will not only look aesthetically pleasing but will also remain sturdy and well-maintained over time.
Step 4: Spacing and Arrangement Techniques
After hanging and securing your artwork, the next important step is fine-tuning the spacing and arrangement to ensure the gallery wall looks polished and balanced.
Spacing plays a crucial role in determining whether the gallery wall feels intentional and cohesive or chaotic and cluttered.
Establishing Proper Spacing
- Consistent Gaps: Maintaining equal spacing between frames (usually 2-3 inches apart) creates a visually cohesive look.
- Negative Space Matters: Avoid overcrowding; giving each piece room to breathe enhances visual clarity.
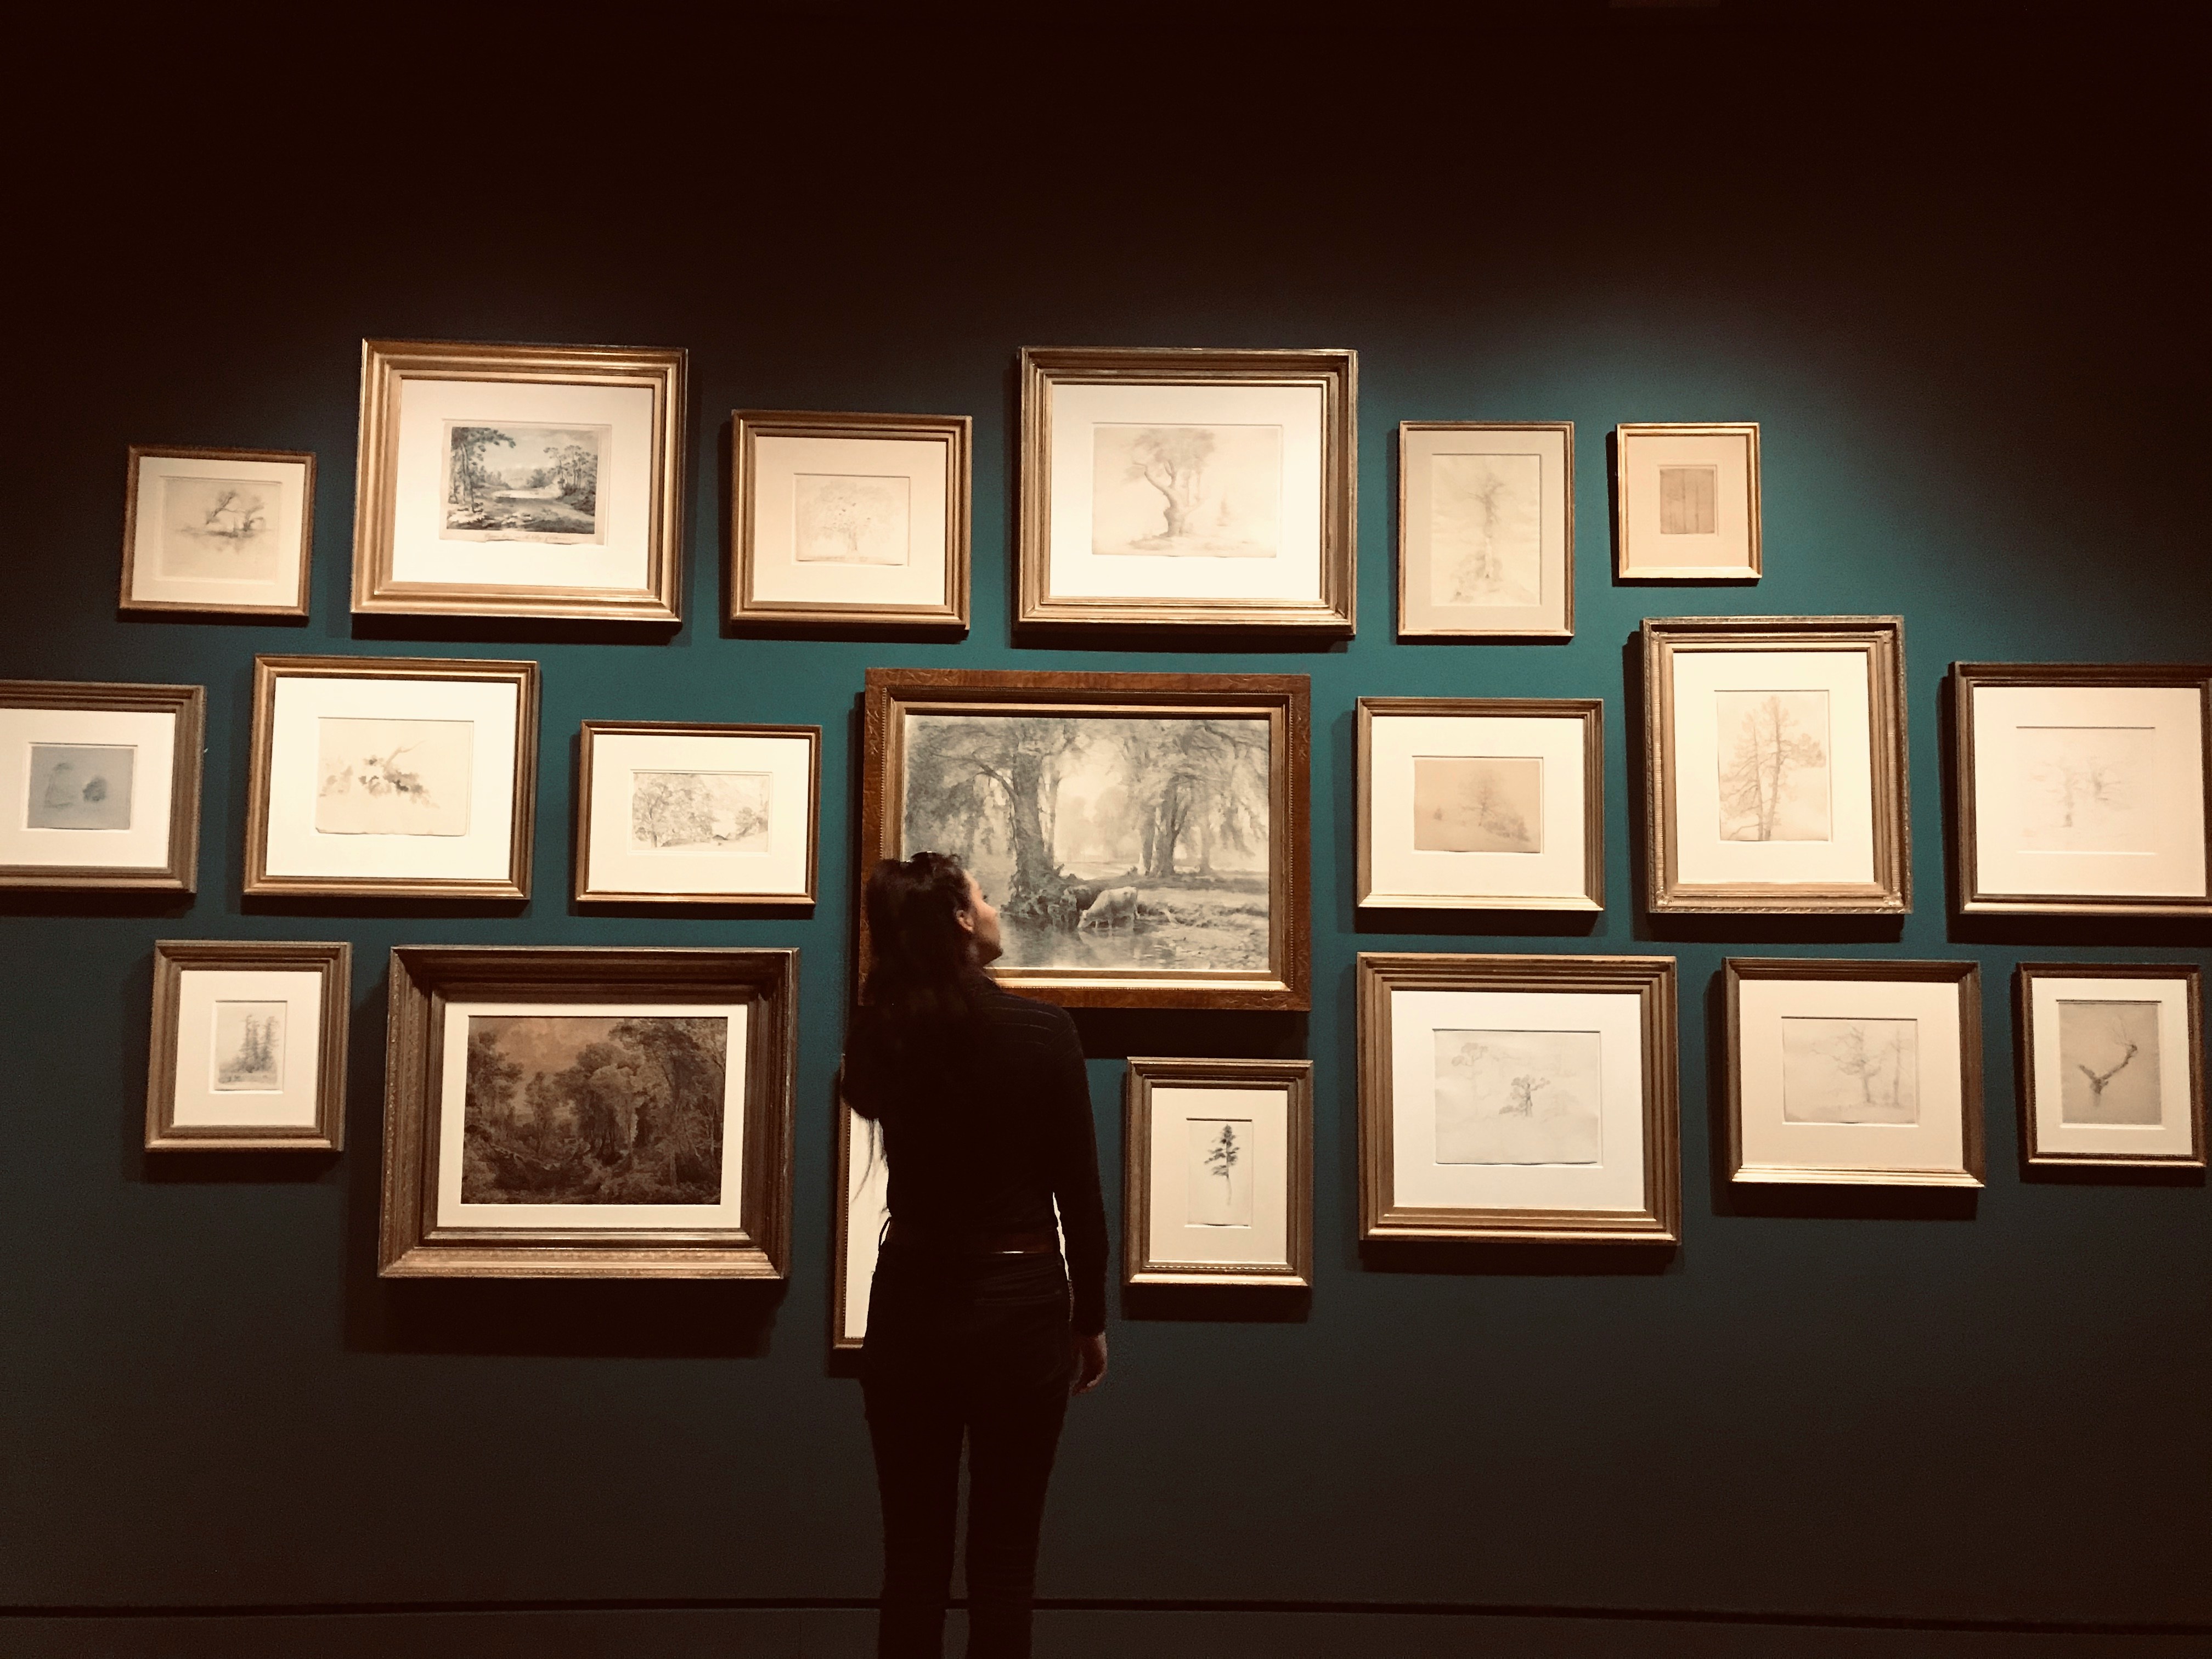
- Varying Heights: In salon-style gallery walls, staggering frame heights helps create a more dynamic and engaging layout.
Common Layout Techniques
- Grid Layout: Frames are arranged in a perfect grid for a clean, structured look.
- Salon-Style Layout: A more relaxed, asymmetrical arrangement that mimics old European salons.
- Linear Layout: Frames are aligned along a single line, ideal for narrow walls or hallways.
- Cluster Layout: Frames and objects are grouped in a loose, overlapping manner, creating a casual and contemporary look.
Balancing Visual Weight
Larger frames should be placed towards the center or slightly off-center to anchor the arrangement, while smaller pieces can be used to fill in gaps.
Distributing color and textures evenly across the wall helps avoid any section feeling heavier than another.
By carefully considering spacing, alignment, and overall balance, your gallery wall will have a polished, professional appearance that enhances the space without overwhelming it.
Taking the time to measure and adjust spacing ensures a stunning and cohesive gallery wall that truly stands out.
Step 5: Lighting Considerations for a Gallery Wall
Proper lighting enhances a gallery wall by highlighting the artwork and creating depth.
Without the right lighting, even the most carefully curated gallery wall may look dull or lack emphasis.
Incorporating strategic lighting techniques will elevate your display and ensure it remains a striking feature in your home.
Types of Lighting for Gallery Walls
- Track Lighting: Adjustable fixtures that allow for directional lighting, making them ideal for illuminating multiple pieces at once.
- Wall Sconces: Elegant and decorative options that provide focused lighting while enhancing the overall ambiance of the room.
- Picture Lights: Mounted above individual frames, these lights highlight specific artwork and create a museum-like effect.
- Recessed Lighting: Subtle and unobtrusive, recessed lights provide even illumination without distracting from the artwork.
- LED Strip Lighting: Installed behind frames or along the edges of a gallery wall to create a modern, ambient glow.
How to Position Lighting for Maximum Effect
- Avoid glare and reflection: Position light sources at an angle to reduce glare, especially if frames have glass fronts.
- Layer different lighting sources: Using a combination of ambient, accent, and task lighting helps to create a dynamic presentation.
- Adjust brightness levels: Dimmer switches allow you to control the intensity of the lighting and create different moods.
- Highlight focal points: Ensure that key pieces receive more focused light to draw attention.
Choosing the Right Bulbs for Artwork
Selecting the right type of light bulb is crucial for preserving artwork and achieving the desired aesthetic.
LED bulbs are the best choice because they emit minimal heat and UV radiation, preventing artwork from fading over time.
Warm white light (2700K-3000K) enhances the richness of colors without creating harsh contrasts.
By incorporating thoughtful lighting techniques, your gallery wall will not only be more visually appealing but will also maintain its integrity over time.
Proper lighting ensures that every piece is showcased to its fullest potential, turning your gallery wall into a true design statement in your home.
Step 6: Maintaining and Updating Your Gallery Wall
Creating a gallery wall is just the beginning. To keep it looking fresh and visually appealing over time, regular maintenance and occasional updates are necessary.
Artwork, frames, and the overall arrangement should evolve with your style and needs. Below, we’ll explore ways to ensure your gallery wall remains a standout feature in your home.
Regular Maintenance Tips
- Dusting and Cleaning: Frames and artwork can collect dust over time, diminishing their visual impact. Use a microfiber cloth or a feather duster to gently remove dust from frames and glass surfaces. For glass-covered artwork, a mild glass cleaner can be used sparingly.
- Checking for Shifts and Misalignment: Over time, frames can shift slightly due to vibrations or accidental nudges. Periodically check and realign frames to maintain the intended arrangement. A level can help ensure accuracy.
- Inspecting Hardware and Stability: Ensure that all nails, wall anchors, or adhesive strips are still holding firmly. If any frames feel loose or unstable, reinforce them with new hardware to prevent damage or falling.
Updating Your Gallery Wall Over Time
Even the most thoughtfully curated gallery wall may need updates over time to keep it exciting and relevant. Here are some ways to refresh your display:
- Swapping Out Artwork: Rotate pieces seasonally or when your tastes evolve. You don’t need to replace the entire gallery wall—simply swapping out a few pieces can make a significant difference.
- Adding New Pieces: If you acquire new artwork, consider integrating it into the existing arrangement. Adjust spacing or frame styles as needed to accommodate new additions.
- Changing Frames or Matting: Updating frames or adding colored mats can give old artwork a fresh, modern look without changing the content.
- Experimenting with Different Layouts: Rearranging the pieces periodically can breathe new life into your gallery wall. Try different compositions, such as transitioning from a grid layout to a more organic salon-style arrangement.
- Incorporating Three-Dimensional Elements: Adding sculptural elements, wall-mounted planters, or decorative objects can make your gallery wall feel more dynamic and visually engaging.
Keeping Your Gallery Wall Personalized
A gallery wall should feel like an extension of your personality and interests.
As your experiences, hobbies, or family grow, reflect those changes in your display. Incorporate family photos, artwork from your travels, or sentimental pieces that hold meaning.
Additionally, if your gallery wall is in a frequently used space, such as a living room or hallway, consider making it interactive.
Corkboard frames, clipboards, or framed fabric boards allow for easy swapping of notes, postcards, or seasonal decorations.
By maintaining and updating your gallery wall regularly, you can ensure that it remains a vibrant, evolving centerpiece in your home. A well-maintained gallery wall continues to tell your story while adapting to your ever-changing style and inspirations.
Step 7: Troubleshooting Common Gallery Wall Issues
Even with the best planning and execution, issues can arise when creating and maintaining a gallery wall. Frames may become misaligned, pieces might feel out of place, or the overall look may not match the vision you had in mind.
Let’s cover some of the most common problems that occur with gallery walls and provide practical solutions for each one.
Issue 1: Frames Shifting or Becoming Misaligned
Over time, frames can shift due to vibrations, movement in the house, or simply from being knocked out of place. This can make your gallery wall look uneven and unpolished.
Solutions:
- Use command strips or mounting putty behind the corners of each frame to keep them secure.
- Ensure you are using the correct type of hanging hardware, such as picture hooks or wall anchors, to provide better stability.
- If you live in an area with frequent vibrations (e.g., near a busy street), consider using museum putty to keep frames in place.
- Periodically check and adjust frames to maintain the intended layout.
Issue 2: The Gallery Wall Feels Too Cluttered
Sometimes, after hanging all the pieces, the gallery wall may feel overwhelming, chaotic, or unbalanced.
This can happen if too many pieces are placed too closely together or if the color scheme lacks harmony.
Solution:
- Step back and assess the overall composition—does it feel too crowded?
- Try increasing the spacing between frames by at least 2-3 inches to give each piece breathing room.
- Remove a few elements and replace them with negative space or a smaller selection of frames to create a more open feel.
- If the issue is color-related, consider rearranging pieces to create a more balanced distribution of colors throughout the wall.
Issue 3: The Layout Doesn’t Match Your Vision
You may have followed all the planning steps, but once the gallery wall is up, it just doesn’t look how you envisioned it.
The arrangement may feel awkward, or the pieces may not complement one another as expected.
Solution:
- Rearrange before committing: Use paper templates or painter’s tape to test different layouts before drilling holes.
- Swap in new pieces or introduce variation in frame sizes to break up an overly uniform look.
- Consider adding an anchor piece—a larger or more visually striking artwork—to bring focus to the wall.
- Experiment with different arrangements, such as shifting from a grid layout to a salon-style arrangement.
Issue 4: Frames or Artwork Look Too Small for the Wall
If your gallery wall feels underwhelming, it could be due to the pieces being too small in proportion to the wall space.
Solution:
- Try grouping smaller frames closer together to create a more substantial focal point.
- Add larger pieces to the composition to create better balance.
- Use matting in frames to increase the visual impact of smaller artwork without making drastic changes.
- If possible, expand the layout by incorporating additional elements like mirrors, shelves, or sculptural pieces.
Issue 5: Uneven Lighting Causes Shadows or Glares
Improper lighting can create harsh shadows or distracting glares on framed artwork, making it difficult to fully appreciate the details.
Solution:
- Adjust lighting angles to avoid direct glare on glass-covered artwork.
- If using overhead lights, install dimmable fixtures or adjust bulb placement to distribute light more evenly.
- Consider anti-reflective glass for framed pieces if glare is a persistent issue.
- Use wall sconces, track lighting, or LED strip lights to provide balanced illumination without creating harsh shadows.
Issue 6: The Wall Feels Too Static or Stale Over Time
Over time, even a well-designed gallery wall can start to feel stagnant if it remains unchanged.
Solution:
- Introduce seasonal or themed updates by swapping out a few pieces.
- Add new dimensions by incorporating floating shelves to display small sculptures or books.
- Rotate pieces in and out periodically to keep the gallery wall feeling fresh.
- Experiment with temporary elements, such as washi tape borders or fabric backdrops, to create a dynamic effect without permanent changes.
Things to Keep in Mind When Troubleshooting
Gallery walls are a fantastic way to express creativity and personality, but they sometimes require small adjustments and refinements over time.
The key to maintaining a beautiful gallery wall is flexibility—being open to small changes, periodic updates, and trying different arrangements until everything feels just right.
By addressing these common issues, you can ensure your gallery wall remains visually appealing, functional, and a standout feature in your home for years to come.
Whether it’s adjusting alignment, rethinking the layout, or fine-tuning the lighting, troubleshooting allows your gallery wall to evolve alongside your space and personal style.
Step 8: Final Touches to Perfect Your Gallery Wall
Once your gallery wall is arranged, secured, and well-lit, adding a few final touches can elevate it from a simple arrangement to a professional-looking display that enhances the ambiance of your home.
These final steps include accessorizing the surrounding space, ensuring continuity with the rest of the room, and integrating additional design elements that make the gallery wall feel intentional and polished.
Enhancing the Space Around the Gallery Wall
Your gallery wall doesn’t exist in isolation—it should blend seamlessly with the rest of your decor.
Consider these ways to enhance its presence in the room:
- Coordinate with furniture placement: Position seating or key pieces of furniture near the gallery wall to draw attention and create a cohesive flow in the room. A sofa, console table, or even a reading nook can serve as an anchor for the gallery wall.
- Use complementary decor: Add accent pieces, such as vases, decorative books, or plants, to nearby tables or shelves to reinforce the theme and color palette of the gallery wall.
- Incorporate a statement rug or throw: Soft furnishings can tie the colors and textures of the gallery wall into the overall aesthetic of the room, making the display feel more integrated.
Adjusting and Refining the Layout
Even after installation, small tweaks can make a significant impact. Here are some final adjustments to consider:
- Step back and assess: Walk around the room and view the gallery wall from different angles. This helps to identify any pieces that may need slight repositioning.
- Fine-tune spacing: Even a fraction of an inch can make a difference. Use a level to double-check alignment and ensure equal spacing between frames.
- Swap pieces if necessary: If an element doesn’t quite fit, don’t hesitate to swap it out for another piece or adjust the arrangement slightly.
Adding Depth and Dimension
To make your gallery wall feel more dynamic, consider incorporating mixed media or three-dimensional elements:
- Floating shelves: Installing one or two shelves within the gallery wall layout provides space for small sculptures, candles, or stacked books, adding layers to the display.
- Mirrors or metallic accents: A few mirrored or metallic-framed pieces can catch and reflect light, making the gallery wall feel more vibrant.
- Textural elements: Fabric wall hangings, shadow boxes, or woven artwork can introduce texture and depth, preventing the gallery wall from looking too flat.
By adding these finishing touches, you can transform your gallery wall from a basic art arrangement into a carefully curated feature that enhances your space and evolves over time.
These final refinements ensure that your display remains visually engaging, seamlessly integrated, and a true reflection of your personal style.
How to Create a Gallery Wall: Make it Yours!
Creating a gallery wall is a rewarding way to add personality and artistry to your space. It is more than just an arrangement of frames; it is an opportunity to tell a story, express creativity, and bring life to an empty wall.
By considering elements such as selecting a theme, choosing cohesive artwork, planning the layout, and executing proper hanging techniques, you can achieve a visually stunning and well-balanced display.
A well-designed gallery wall enhances the ambiance of a room, serving as both a conversation piece and a personal showcase of cherished moments, artistic interests, or collected memories.
Whether your preference is a clean and minimalist approach or a bold and eclectic statement, the key is to create a composition that resonates with you and complements the existing decor.
While the installation process may require patience and adjustments along the way, the final result is worth the effort.
A thoughtfully curated gallery wall will continue to evolve over time, allowing you to refresh it with new pieces, adjust its layout, or modify the design to suit changing styles and preferences.
Ultimately, the most important aspect of a gallery wall is that it reflects your own unique personality and makes your space feel like home!